How to catalog your coins
Cataloging the coins you own is the starting point for everything else on Numistec: only once a coin is registered can you add it to a collection, see its estimated value, or share it publicly. This guide walks through adding a coin to your account, step by step.
1. Start in "My Coins"
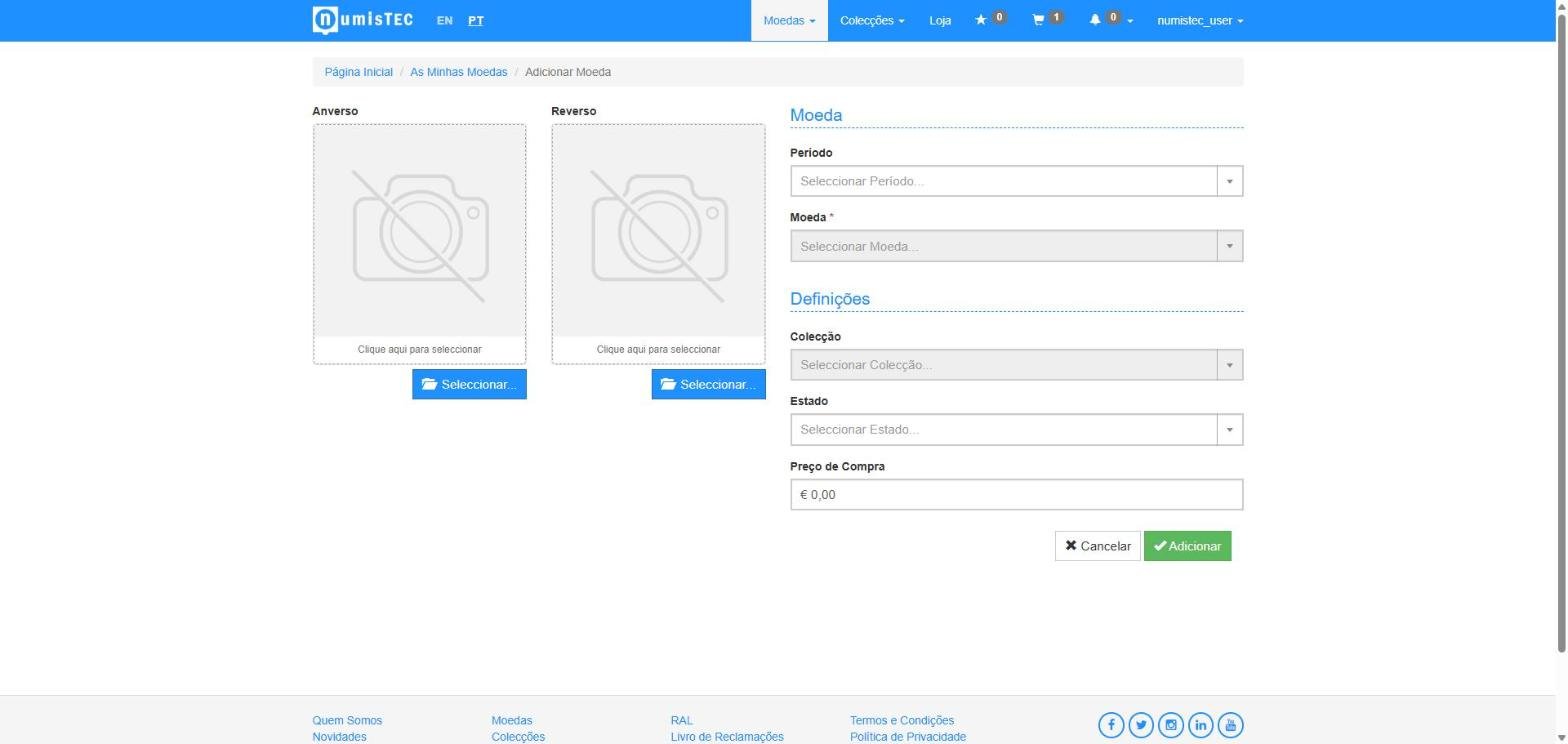
From the "Coins" menu, choose Add Coin. You'll see a simple form: two photo boxes (front and back) and the fields for the piece's details.
2. Pick the catalog coin
Select the Period first (e.g. "1st Republic"), then the matching Coin in the catalog — this links your record to all the existing reference data (year, material, weight, composition), so you don't have to fill it in by hand.
3. Upload the photos
Upload one photo of the front and one of the back. These photos are used to:
- Show the coin in your list and on its detail page
- Automatically build the interactive 3D view
- Power AI-assisted cataloging, if you want to use it
4. Grade and collection
Choose the Grade (e.g. "Fine", "Very Fine") and, if you already have a collection, you can assign the coin to it directly in the Collection field — see How to organize your collections if you don't have one yet.
The coin's detail page
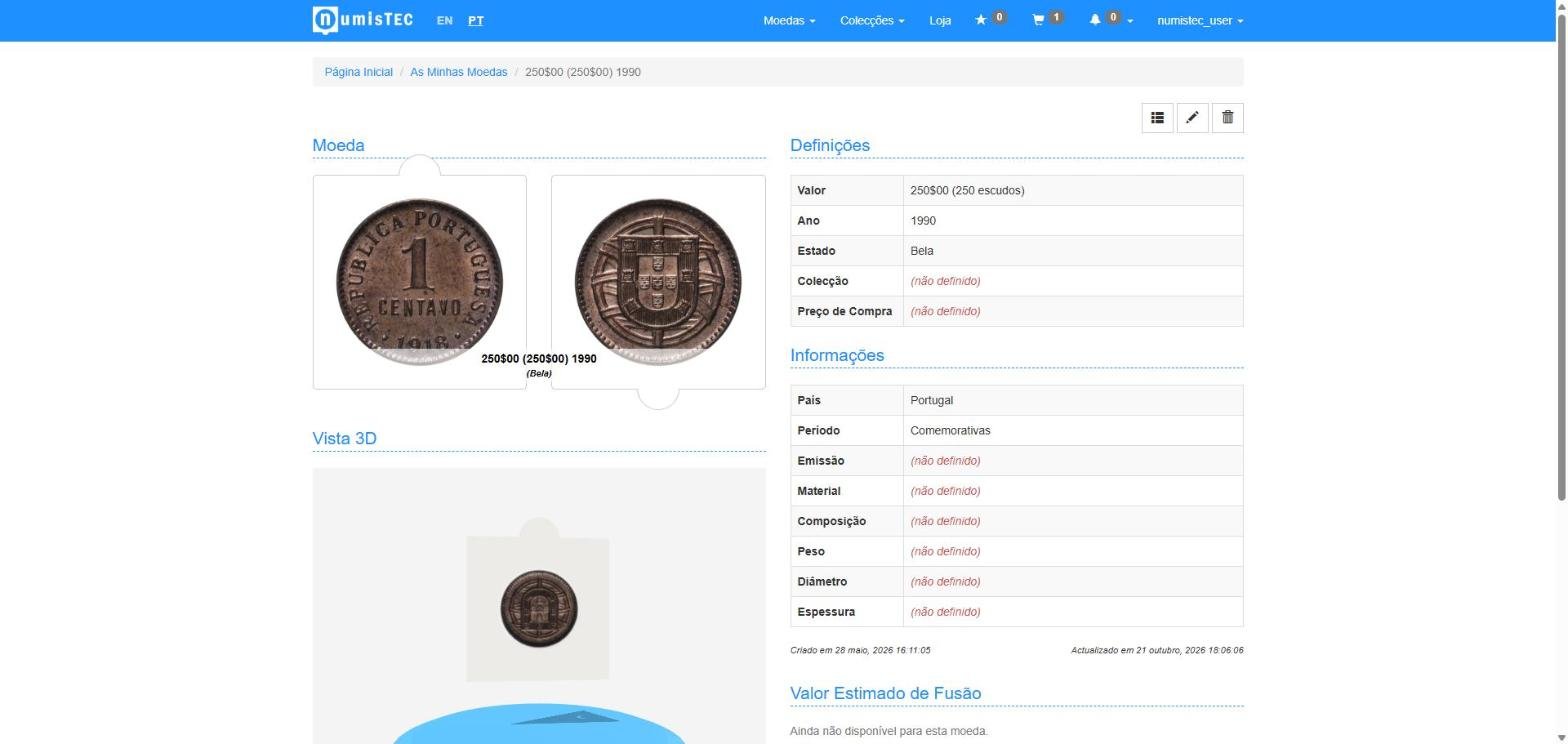
Once saved, every coin gets its own page with the full catalog data (country, period, composition, weight, diameter) and an estimated melt value based on the current market price of the metals.
3D view
From those same two photos, the coin's page shows a spinning 3D view, so you can see it from different angles without any extra photos. This view is available on the Basic and Pro plans — on the Free plan it shows an upgrade button instead.
Public sharing
You can turn on a public link for any of your coins — it shows the 3D view and catalog data, but never your identity or purchase price. You can turn it off or regenerate it at any time.
Coins bought in the shop
If a coin comes from a purchase on Numistec, it's automatically added to your account with a full provenance history — you don't need to add it by hand.
Next step: How to organize your collections.
Still have questions? FAQ